


.NET Core is an open-source, general-purpose development platform maintained by Microsoft and the .NET community on GitHub. It’s cross-platform (supporting Windows, macOS, and Linux) and can be used to build device, cloud, and IoT applications.
.NET Core has the following key features that makes it stand apart from its predecessors.
- It runs on various platforms such as Windows, macOS and Linux operating systems.
- Due to it being consistent across various architectures you can run your code with the same behavior on multiple architectures, including x64, x86, and ARM.
- It includes easy-to-use command-line tools that can be used for local development and in continuous-integration scenarios.
- It has a flexible deployment system, where you can include it in your app or install it side-by-side (user-wide or system-wide installations).
- .NET Core is compatible with .NET Framework, Xamarin and Mono, via .NET Standard.
- The .NET Core platform is open source, using MIT and Apache 2 licenses. .NET Core is a .NET Foundation project.
- .NET Core is supported by Microsoft, per .NET Core Support.
Porting Desktop Application to .Net Core
.NET Core 3 and Visual Studio 2019 are important necessities to porting your desktop apps to core.
Step 1 – Run portability analyzer
Before porting, you should check how compatible your application is with .NET Core. To do so, download and run .NET Portability Analyzer.
- On the first tab, Portability Summary, if you have only 100% in .NET Core column (everything is highlighted in green), your code is fully compatible, go to Step 2.
- If you have values of less than 100%, identify the assemblies that aren’t a part of your application. See if the developers are providing versions for .NET Core or .NET Standard.
- Now look at the other part of assemblies that are coming from your code. If you don’t have any of your assemblies listed in the portability report, go to Step 2. If you do, open Details tab, filter the table by clicking on the column Assembly and only focus on the ones that are from your application. Walk the list and refactor your code to stop using the API or replace the API usage with alternatives from .NET Core.
Step 2 – Migrate to SDK-style .csproj
In Solution Explorer right-click on your project. If you can locate the Edit Project File option, it means you are already using the SDK-style project file, so move to Step 3. If not, do the following:
- Check in the Solution Explorer if your project contains a packages.config file. If you don’t, no action is needed, if you do, right-click on packages.config and choose Migrate packages.config to PackageReference. Then click OK.
- Open your project file by right-clicking on the project and select Unload Project. Then right-click on the project and choose Edit .csproj.
- Copy the content of the project file into Notepad, so you can search in it later.
- Delete everything from your project file opened in Visual Studio. Instead of the text you’ve just deleted, paste the following code.
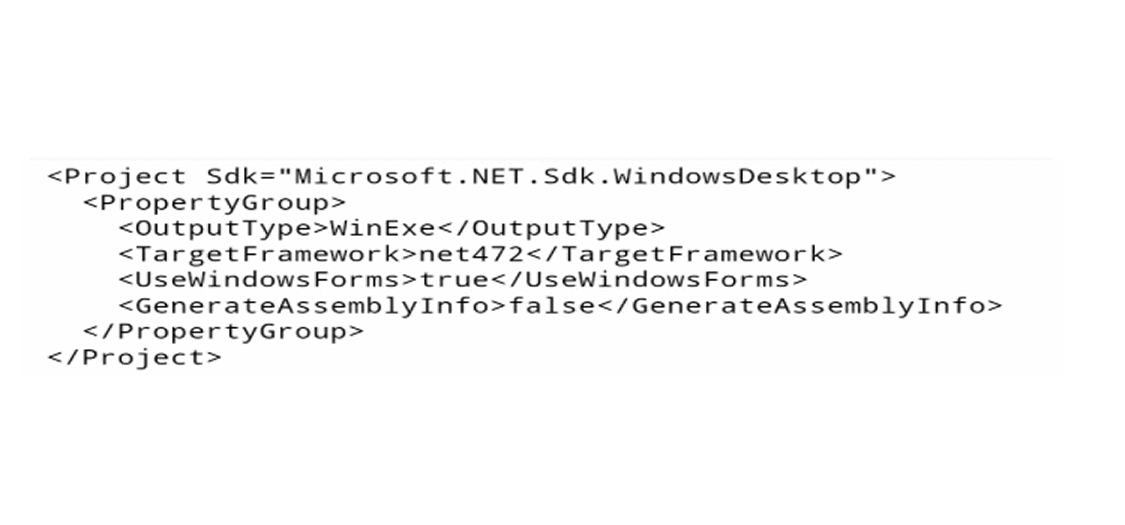
For a WinForms application:
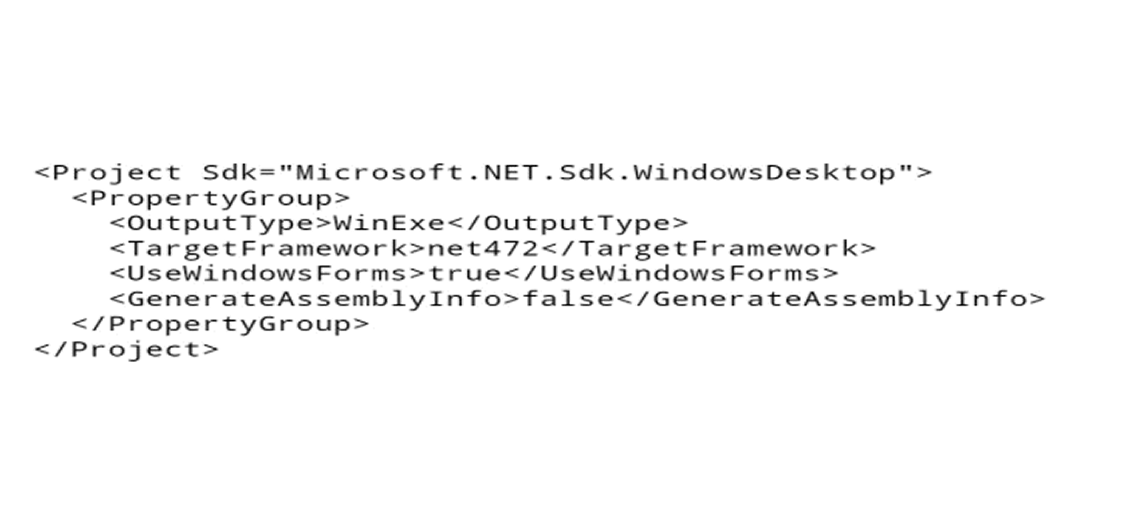
For a WPF application:
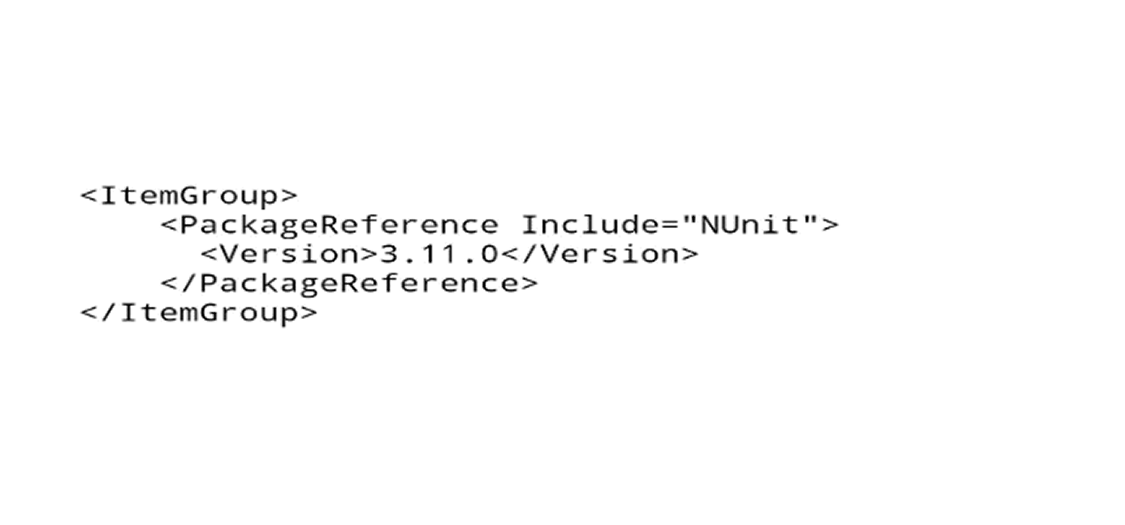
- In Notepad, search for PackageReference. If you did not find anything, move on. If you found PackageReference, copy the entire ItemGroup that contains PackageReference in your project file, opened in Visual Studio, right below the lines you’ve pasted in the step above. Do it for each occurrence of the PackageReference you have found. The copied block should look like this:
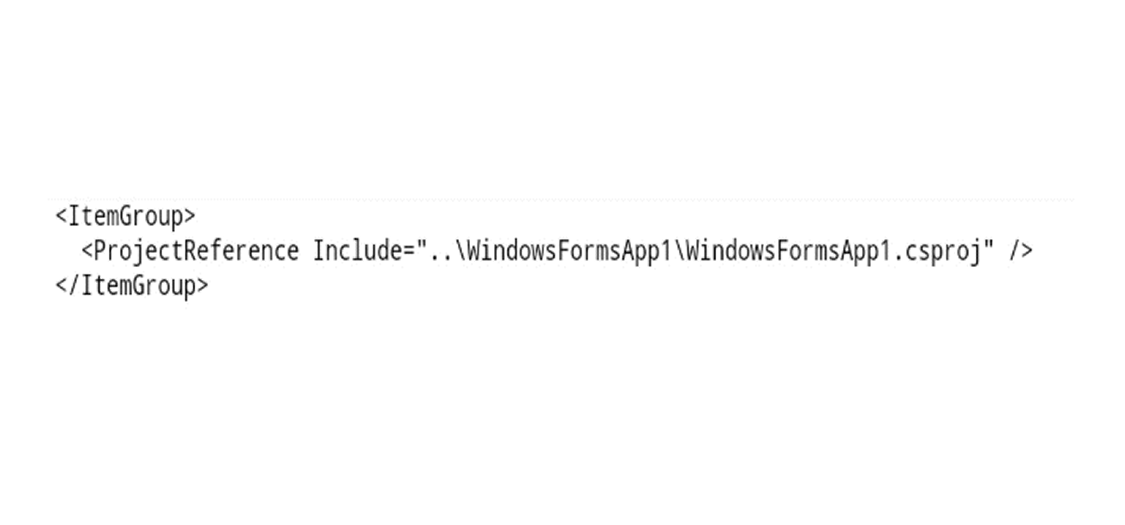
- Now do the same as above for ProjectReference. If you did not find anything, move on. If you found any ProjectReference items, they would look like this:
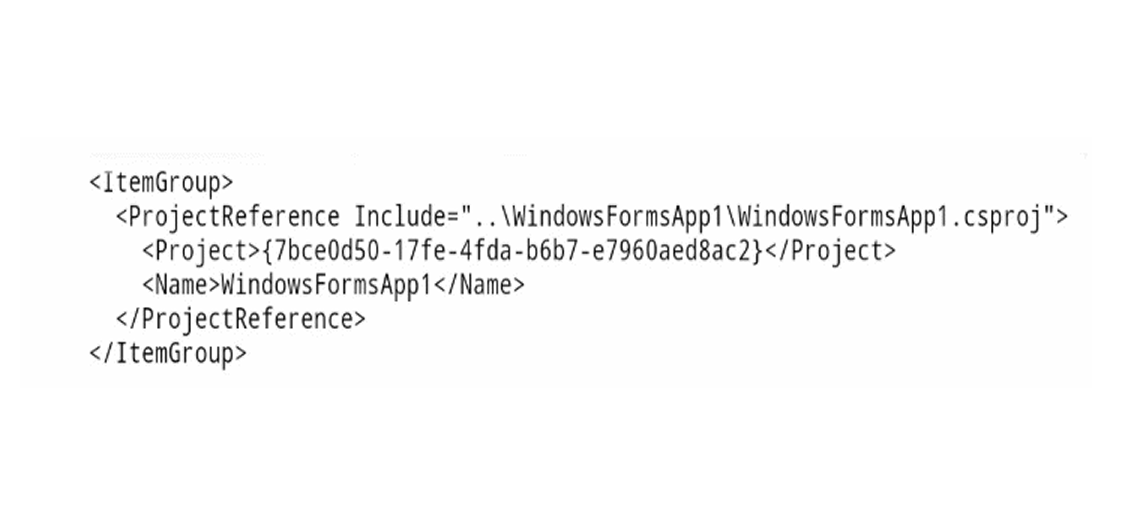
- You can remove lines with Project and Name properties, since they are not needed in the new project file style. So for each ProjectReference that you have found (if any), copy only ItemGroup and ProjectReference like this:
- Save everything. Close the .csproj file in Visual Studio. Right-click on your project in the Solution Explorer and select Reload Project. Rebuild and make sure there are no errors.
You just updated your project file to the new SDK-style! The project is still targeting .NET Framework, but now you’ll be able to retarget it to .NET Core.
Step 3 – Retarget to .NET Core
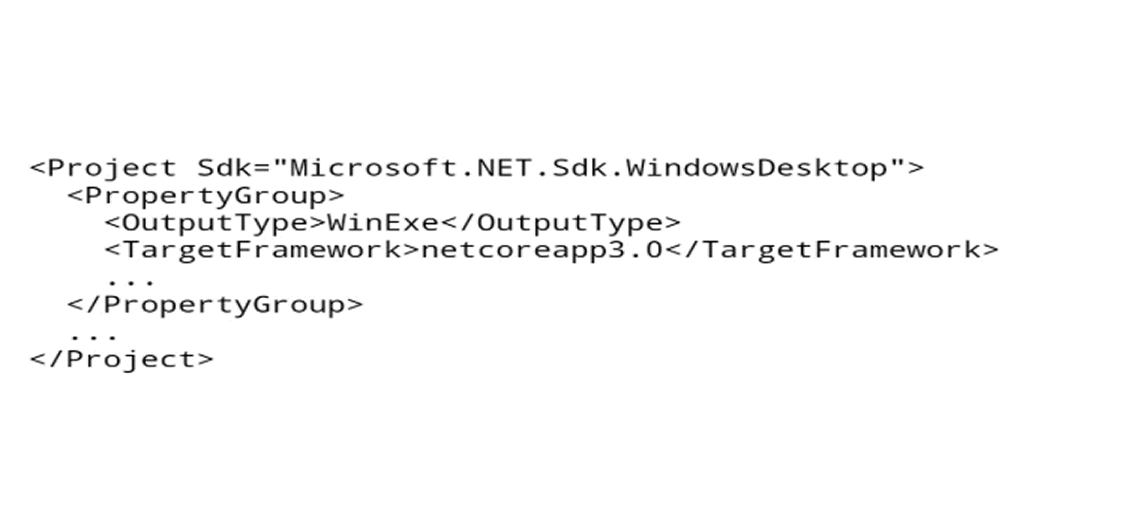
Open your project file by double-clicking on your project in Solution Explorer. Find the property TargetFramework. and change the value to netcoreapp3.0. Now your project file should look like this:
Build and run your project. Congratulations, you ported to .NET Core 3!
If you’re looking for help in porting or creating applications based on .Net Core, contact us today!

Subscribe to Saffron Tech
Explore your marketing zen with our newsletter! Subscribe now.